Pages

Thursday, September 20, 2012

Mustache Love


Mustaches are popping up everywhere....cell phone cases, license plates even tattooed on fingers (personally I love this one). I have a mustache bottle opener, mustache stickers and a whole stack of fake mustaches...just cause I love 'em and you never know when you will need a good disguise.


Recently I was out in the studio finishing up a piece of art and happened to glance up at a package of mustache stickers...then it hit me, I should put a mustache on my art!  It was just the touch of whimsey the piece needed. Now I can't stop making mustaches. All shapes and sizes!


The  most fun I have had with them is drawing tangles on them. Simple cut-outs from white cardstock and a micron pen and now I have tons of Zentangle® mustaches to adorn my journal pages, my works on canvas and even my grandson.


Have fun with this trend, Halloween is right around the corner....tangle a few mustaches to get you in the spirit.

Thursday, September 6, 2012

Ode to Jesse Reno

Making my own journals from recycled materials is something I have been doing for a few years now. I save all of my old envelopes to use in my handmade journals. For some of my journals I use only envelopes...when you add gesso and acrylic paint it makes a wonderful, sturdy surface for art. I also like the fact that the used envelope is already a distressed surface with uneven edges and sometimes even ripped up a little....perfect!!


The low cost as well as the funky look of these journals make it so easy for me to feel the freedom to experiment with materials and techniques. I often use them to try my hand at different artist's styles to see if I can figure out how they did something I like...what materials they used, their symbology and color palette. My journal is just for me so I don't have to worry about copying the artist in the work I may want to sell. I recently listened to a great podcast interview with Rice Freeman-Zachery and artist Jill Berry where they discussed the benefits of intensive study of other artist's work.


Jesse Reno is one of my favorite artists...he paints with his hands, draws amazing creatures and uses color brilliantly. I am hoping to take one of his workshops in the next year.


In the meantime I had fun experimenting in my journals with acrylic paints, markers and a few Jesse Reno like creatures.

Friday, July 13, 2012

Mail art is fun!!

      Remember when mail had so many possibilities, a handwritten letter from grandma or holiday photos finally developed and mailed from your aunt. If you were a really lucky kid a birthday card with a $10.00 bill!! Not so much anymore, ecards are awaiting you in email, you can check out the family photos on Facebook and god forbid you send money in the mail cause it never seems to reach it's destination.  Why is that anyway?


Front and back of large envelope.

     I really enjoy working in my recycled junk journals so why not treat mail as art. Instead of decorating a page in my journal I decided to work on a few envelopes to have handy for mailing.There is a whole movement devoted to 'mail art'. I must admit I have just gotten on this bandwagon....I chastise myself for not sending more cards to friends and family. Maybe now I will be better about mailing those holiday and birthday cards.

Front of envelope, bird and leaf images are napkins.
     I wanted to share a few of the art mailings I have done over the past week. I always begin by looking for book pages, sheet music, napkins or old wrapping paper to apply as the first layer. An artist friend of mine, Judy Evans, always seems to find the most wonderful napkins and she shares them with our local art group...thank you Judy!!


Napkins, sheet music, pattern paper, ledger paper, tissue paper and an old piece of my art applied to envelopes with matte medium, ready for gesso, paint and stamps.

      Using napkins as a focal point makes it so easy to create a beautiful envelope without a lot of work. Just slop it on with some matte medium, wait for it to dry - add gesso, paint, stencils, and stamps. I usually add a final coat of matte or gloss medium to seal it.  If you have beautiful handwriting or a calligraphy pen add the name and address by hand as well, or simply apply a label with name and address. 

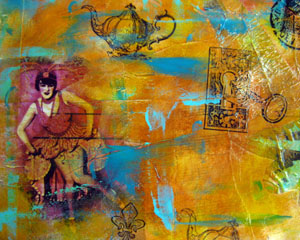
Flower and flapper girl napkin peeking through after gesso, paint and stamps.

       Try it....surprise someone with a special piece of art delivered to their door. Next time you send a real birthday card add some art to the envelope first.
 

Wednesday, July 4, 2012

Zentangle® Creatures

     Sharing your art with a like-minded group is priceless. I feel very lucky to be able to get together once a month with a local mixed media art group, the 'Articrafters'. I helped to form this group a few years ago. The plan was to share what we know and love - and experiment with all kinds of art and craft.  It is also a great opportunity to be in front of a group of friendly faces and hone your teaching skills.  Almost every member has at one time shared a favorite project, workshop or tip.

  Tangled in a Strathmore mixed media journal, colored with Prismacolor colored pencils.

     Before I began teaching from my 'Stash and Smash' book I practiced on my friends and got some great feedback. It also helps with your timing - class and instruction time can go by so quickly you have to be very aware or you leave students with an unfinished project. Not a good thing.

            Tangled on a Zentangle tile, colored with Derwent Inktense pencils.


     I hope as an artist you have found your own kindred spirits to share your art and your vision with. Articrafters is always welcoming new members, some of them recently requested a Zentangle refresher course. As I was looking through some of my Zentangle drawings I found a few I wanted to share with you. My strings (the starting point for most zentangle drawings) always seem to turn into funky creatures. I love making a few swirly marks and trying to decide what they should become. The creatures don't seem finished unless they have drips, tears or dots!!

                              Tangled with Micron pen on Zentangle tile.

Thursday, April 5, 2012

Strathmore Visual Journals


     Most of the time my preferred medium is acrylic paint. They work so beautifully with the recycled journals I normally work in. I also love the Strathmore Visual Journals...they have drawing, mixed media, bristol board, and my favorite...watercolor paper.  After watching Strathmore's latest online workshop, Watercolor Sketching with Cathy Johnson I decided it was time to experiment with my long ignored watercolors. Until I picked up a few tips from Cathy's workshop I had always felt like all I created with watercolors was a muddy mess.


     I discovered my favorite pages were the ones I first laid a little color on, either leftover color on a wet brush applied to the page or wetting the page first and spreading dabs of color. Once this was dry I then drew shapes with a pencil and started painting. Drawing the same basic shapes on different pages gave me a chance to perfect the brush strokes needed for curved areas. With a little practice I was able to create light and dark areas.....my favorite watercolor effect.


    Of course I had to add a few tangles to one of them, most of the patterns are from Sandy Steen Bartholmew's books. I first erased the pencil lines I had drawn for the original shapes...this gave me a chance to come back in with watercolors and create an aura or shadow around them.


     I also learned just one swoop of color on the brush isn't enough for me....I let some areas dry and came back in with at least another brush or two of color to deepen portions of the image. All of these pages are now ready for journaling or zentangle art...which one?

Sunday, March 18, 2012

Colorful "Stash style" cover for Art Journals

     Several people have asked for more detail on how to create the journal cover I used for the front of my book 'Stash and Smash'. Here's the trick, I use both my fingers and a palette knife to apply the paint. If I use a brush it looks too blended for me. I make sure each layer is dry before adding a second color on top, and keep a baby wipe handy to scrub away a small portion of the paint.


     The base I used is chipboard, or in my case the back of an old watercolor tablet. I cut it to desired size for my journal and apply two coats of gesso to each side. One coat of gesso horizontal, when dry the second coat vertically...more texture that way.

     I then apply sheet music and colored tissue paper with Golden matte medium.


     Using my fingers I add patches of heavy body acrylic paint all over the cover, more of a "hit and miss" style of application rather than lines of color. When this layer is dry I use a palette knife to skim over portions of the previously applied paint. Sometimes I will add a third layer on top, it just depends on how I feel about the overall look of color.


     When these layers of paint are dry I add white tissue papers which have been stamped with a couple of my favorite stamps, the eye and the crisscross pattern are both on tissue paper.


     I use heavy gel medium to add the wine bottle eyelashes, as well as the coin, plastic palm tree and El Musico card in the picture below.

  
     The matchbox cover and other paper ephemera are stuck on with duck tape. After all the objects are affixed to the journal cover I use my fingers to lightly blend paint colors over them so the piece will seem more cohesive.

 
  The last step is regular stamps (I always use Staz-On ink pads since they are permanent) and a white gel pen for embellishments.

  I bind this type of journal one of two ways.
     Punch holes in it and use binder rings or bind it with a Zutter or other spiral binding machine. You can also take it to your local office supply for spiral biinding. If you do take it to the office supply be sure the side to be bound is flush, they are not able to bind irregular shaped journals.....I found this out the hard way!!
     Tip: Add watercolor paper, scrap paper and old art pieces cut to size as journal pages.

Saturday, March 3, 2012

Journal, journal, journal.

Seems that's all I do these days. I look forward to creating in my journals every day. It's been a really busy week for me - I've taught two "Stash and Smash" journal classes - my husband was in the hospital for knee replacement - and don't even get me started on everything else my week held. Thank goodness for journaling, it's a great way for me to unwind and let go of it all.

                                                                CHA make and take.

I really enjoy sharing my journal ideas with others. Making them from recycled materials seems to take the pressure off...less fear of your art not being worthy...or some such thing. The recycle journals I make are from paper bags and old envelopes - free stuff! I add gesso, paints, papers, images and  markers to really layer them up. A lot of my images come from old magazines. I love this one it reminds me of one of my favorite, fun songs - "On Top of Spaghetti" - remember that one?


                                                                Recycled journal page

At the end of January I attended the Craft and Hobby Association conference to premiere my new book Stash and Smash ... art journal ideas. It was wonderful...Sandy Steen Bartholomew was there doing make and takes as well as Mark Montano and Joanne Fink. Suzanne McNeill received a much deserved  Industry Achievement Award. Mark Montano even set in on one of my make and takes....so exciting, he is a real sweetheart.

                                   Sandy Bartholomew, Suzanne McNeill, me, Mark Montano.